# Case Study
Building a complete pipeline in GitLab CI-CD for deploying a dockerized Laravel application on AWS EKS
### **Agenda:**
> 1\. Introduction.
>
> 2\. Create a Gitlab repository.
>
> 3\. AWS Preparing.
>
> 4\. Build GitLab CI/CD.
>
> 5\. Conclusion.
### 1. Introduction:
CI/CD is a methodology focused on consistently delivering applications to clients by integrating automation into various stages of app development. The fundamental principles of CI/CD include continuous integration, continuous delivery, and continuous deployment.
Integrating security into the CI/CD pipeline is also important. This practice, known as **DevSecOps**, ensures that security measures are embedded throughout the development, testing, and deployment processes rather than being treated as an afterthought. Integrating security into CI/CD offers several benefits:
1. Early detection of vulnerabilities: By incorporating security checks and automated testing into the CI/CD pipeline, potential vulnerabilities and issues can be identified and addressed early in the development process. This reduces the likelihood of security breaches and minimizes the costs associated with fixing security issues at a later stage.
2. Faster remediation: When security is an integral part of the CI/CD pipeline, it enables faster detection and resolution of security issues, improving the overall efficiency of the development and deployment processes.
3. Improved collaboration: DevSecOps fosters better collaboration among development, operations, and security teams, promoting a shared responsibility for application security. This collaborative approach can help identify and address security concerns more effectively.
4. Compliance: Integrating security into the CI/CD pipeline facilitates compliance with industry regulations and standards. By automating security checks and monitoring, organizations can better demonstrate their adherence to security requirements and mitigate risks associated with non-compliance.
5. Continuous improvement: A CI/CD pipeline that incorporates security enables a continuous feedback loop, allowing teams to learn from past security incidents and improve their practices over time.
There are numerous platforms and tools available for constructing a CI/CD pipeline, including AWS, Azure, GCP, GitHub, GitLab, Jenkins, and more. In this particular scenario, GitLab has been selected as the preferred solution for implementing the CI/CD pipeline.
### 1.1 Overview of the CI/CD Pipeline
The CI/CD pipeline can be summarized through the following steps:
1. Build a Docker image from the Laravel PHP repository.
2. Push the Laravel image to a Docker Hub repository.
3. Retrieve the Laravel image from Docker Hub to execute testing.
4. Upon successful testing, pull an AWS base image to facilitate communication with the AWS Elastic Container Registry (ECR) and push the Laravel image created in step 1.
5. Establish a connection with AWS Elastic Kubernetes Service (EKS) to deploy or update the Kubernetes cluster.
#### If I have extra time, I would be pleased to incorporate security measures into the existing CI/CD pipeline
### 2. Create a Gitlab repository.
After creating our account in GitLab:
Click on "New Project" Create a blank project → Write a project name and make it private.
### 2.1 Build a Docker image:
In the repository, there is a Dockerfile as below:
```
FROM php:7.2-apache-stretch
LABEL name=AsafAhmadov
COPY composer.lock composer.json /srv/app/
RUN apt-get update && apt-get upgrade -y && apt-get dist-upgrade -y && apt-get install -y \
build-essential \
mysql-client \
libpng-dev \
libjpeg62-turbo-dev \
libfreetype6-dev \
locales \
zip \
jpegoptim optipng pngquant gifsicle \
vim \
unzip \
git \
curl \
dos2unix \
supervisor
#nodejs
# Clear cache
RUN apt-get clean && rm -rf /var/lib/apt/lists/*
# Install composer
RUN curl -sS https://getcomposer.org/installer | php -- --install-dir=/usr/local/bin --filename=composer
RUN docker-php-ext-install mbstring pdo pdo_mysql \
&& a2enmod rewrite negotiation \
&& docker-php-ext-install opcache
COPY --chown=www-data:www-data . /srv/app
RUN cp /srv/app/vhost.conf /etc/apache2/sites-available/000-default.conf && rm /srv/app/vhost.conf
# Install PHP_CodeSniffer
#RUN composer global require "squizlabs/php_codesniffer=*" --working-dir=/srv/app
WORKDIR /srv/app
RUN composer update
RUN cp .env.example .env
RUN php artisan key:generate
# Add local and global vendor bin to PATH.
ENV PATH ./vendor/bin:/composer/vendor/bin:/root/.composer/vendor/bin:/usr/local/bin:$PATH
# Change current user to www-data
USER www-data
```
In this line:
```
COPY --chown=www-data:www-data . /srv/app
```
Here, i copy all the content of the repository inside the image that depends on **php:7.2-apache-stretch image.**
> In the production environment, we need to ignore some files from copy to the image so you can use the **.dockerignore** file.
i will find this line for configuring the **apache** server in the image :
```
RUN cp /srv/app/vhost.conf /etc/apache2/sites-available/000-default.conf && rm /srv/app/vhost.conf
```
We can check **vhost.conf** file in the repository :
{% hint style="info" %}
In our particular scenario, the use of port 80 is primarily for testing and validation purposes, and the implementation of port 443 (HTTPS) has not been deemed necessary at this time. While it is generally recommended to employ HTTPS for enhanced security and data protection, it is understandable that, for specific circumstances such as preliminary testing and internal checks, utilizing port 80 (HTTP) may be acceptable.
{% endhint %}
```
DocumentRoot /srv/app/public
AllowOverride all
Require all granted
ErrorLog ${APACHE_LOG_DIR}/error.log
CustomLog ${APACHE_LOG_DIR}/access.log combined
```
### 3. AWS Preparing :
### 3.1 Create a new AWS user :
Upon creating an AWS account, the initial user is the root user. However, utilizing the root user for regular tasks is not recommended due to security concerns. Instead, it is advisable to create a new user with the necessary permissions tailored to fulfill the specific requirements of the intended scenario. In AWS (Amazon Web Services), it is recommended to create groups and give permissions to groups rather than individual users for several reasons, which are primarily related to security, manageability, and best practices.
### 3.1.1 Creating policies for the group :
Per your request, I have created an IAM group named "tempUsers" within AWS, which has been granted read and list permissions exclusively for EC2, EKS, and ECR services. This configuration ensures that users added to this group will have limited access, as specified. By adopting this approach, we are adhering to the recommended best practices for managing permissions within AWS, allowing for enhanced security and streamlined user management.
```
{
"Version": "2012-10-17",
"Statement": [
{
"Sid": "VisualEditor0",
"Effect": "Allow",
"Action": [
"ec2:GetResourcePolicy",
"ecr:Describe*",
"ec2:GetDefaultCreditSpecification",
"ec2:GetIpamResourceCidrs",
"ec2:GetIpamPoolCidrs",
"ec2:GetInstanceUefiData",
"ec2:GetEbsEncryptionByDefault",
"ec2:ExportClientVpnClientConfiguration",
"ec2:GetCapacityReservationUsage",
"ec2:GetHostReservationPurchasePreview",
"ec2:GetNetworkInsightsAccessScopeAnalysisFindings",
"ec2:GetSubnetCidrReservations",
"ecr:BatchGetRepositoryScanningConfiguration",
"ec2:GetConsoleScreenshot",
"ec2:GetConsoleOutput",
"ec2:ExportClientVpnClientCertificateRevocationList",
"ec2:GetLaunchTemplateData",
"ec2:GetSerialConsoleAccessStatus",
"ec2:GetFlowLogsIntegrationTemplate",
"ec2:GetEbsDefaultKmsKeyId",
"eks:Describe*",
"ec2:GetIpamDiscoveredResourceCidrs",
"eks:List*",
"ecr:BatchCheckLayerAvailability",
"ecr:Get*",
"ec2:GetManagedPrefixListEntries",
"ec2:GetCoipPoolUsage",
"ec2:GetNetworkInsightsAccessScopeContent",
"ec2:GetReservedInstancesExchangeQuote",
"ec2:GetAssociatedEnclaveCertificateIamRoles",
"ec2:GetIpamAddressHistory",
"ec2:Describe*",
"ec2:GetPasswordData",
"ecr:List*",
"ec2:GetAssociatedIpv6PoolCidrs",
"ec2:GetSpotPlacementScores",
"eks:AccessKubernetesApi",
"ec2:GetManagedPrefixListAssociations",
"ecr:BatchGetImage",
"ec2:GetAwsNetworkPerformanceData",
"ec2:GetIpamDiscoveredAccounts"
],
"Resource": "*"
}
]
}
```
**3.1.2 Access the web console of a new user**
{% embed url="" %}
user : testuser
pass : Dont#Trust\@me19 (temp password)
> Use the link to log in, you need to generate a new password.
### 3.2 Install AWC CLI & Eksctl
we should install AWS CLI to configure our services in AWS, and Eksctl for creating an EKS cluster.
### 3.2.1[ Install AWS CLI](https://docs.aws.amazon.com/cli/latest/userguide/getting-started-install.html)
The AWS Command Line Interface (CLI) is a unified tool **to manage your AWS services**. With just one tool to download and configure, you can control multiple AWS services from the command line and automate them through scripts. To install it, run the following commands:
### 3.2.2 install eksctl
Eksctl is a simple CLI tool for **creating clusters on EKS** — Amazon’s new managed Kubernetes service for EC2. It is written in Go, and uses CloudFormation. You can create a cluster in minutes with just one command. To install it, run the following commands:
```
curl --silent --location " -s)_amd64.tar.gz" | tar xz -C /tmpsudo mv /tmp/eksctl /usr/local/bineksctl version
```
```
composer:
stage: build
cache:
key: ${CI_COMMIT_REF_SLUG}-composer
paths:
- vendor/
script:
- composer update
- cp .env.example .env
- php artisan key:generate
artifacts:
expire_in: 1 month
paths:
- vendor/
- .env
exclude:
- image
```
### 3.3 Create AWS ECR
Amazon ECR is a fully managed container registry offering high-performance hosting, so you can reliably deploy application images and artifacts anywhere.
* login to AWS console by a new user.
* Create ECR.
* Create Repository
```
aws configure
aws ecr create-repository --repository-name laravel
```
### 3.4 Install Kubectl:
The Kubernetes command-line tool, [kubectl](https://kubernetes.io/docs/user-guide/kubectl/), allows you to run commands against Kubernetes clusters.
```
kubectl version --client
```
1. Download the latest release with the command:
2\. Install kubectl
`sudo install -o root -g root -m 0755 kubectl /usr/local/bin/kubectl`
3\. Test to ensure the version you installed is up-to-date:
> If you do not have root access on the target system, you can still install kubectl to the `~/.local/bin` directory:
>
> `chmod +x kubectl`\
> `mkdir -p ~/.local/bin`\
> `mv ./kubectl ~/.local/bin/kubectl`\
> \&#xNAN;*`# and then append (or prepend) ~/.local/bin to $PATH`*
### 3.5 Create AWS EKS
Now that we have all the prerequisite binaries and libraries installed, let’s go ahead and create an AWS EKS cluster. To create an EKS cluster with `eksctl`, run the following command:
```
eksctl create cluster --name=laravel-asaf-cluster --nodes=2 --node-type=t2.small
```
This command will create a Kubernetes cluster with 2 worker nodes (t2.small), it may take some minutes to fully provision.
you can use kubectl to interact with EKS as follow :
```
# this command is important to update
.kube/config file aws eks update-kubeconfig --region us-east-2 --name laravel-asaf-cluster
# to check the nodes
kubectl get nodes
```
### 4. Build GitLab CI/CD
Now after preparing all the requirements, let me explain the main section of case study ( **GitLab CI/CD pipeline**).
you can check the repo for [.gitlab-ci.yml](https://gitlab.com/jomaajob2/laravel-cicd/-/blob/master/.gitlab-ci.yml) file, at this file you can build all steps for building, testing, and deploying your application
In the file, there are variables that will be used by the pipeline like:
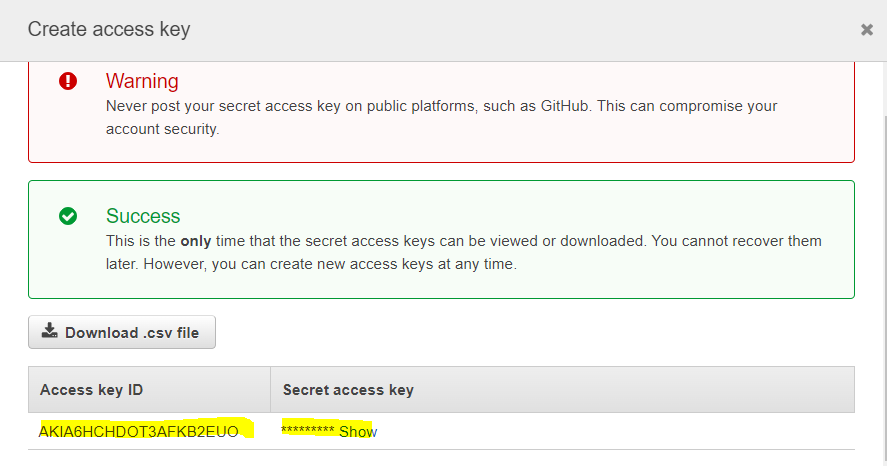
1. AWS\_ACCESS\_KEY\_ID
2. AWS\_DEFAULT\_REGION
3. AWS\_ECR\_REPOSITORY
4. AWS\_K8\_CLUSTER\_NAME
5. ***AWS\_K8\_ECR\_SECRET\_NAME = regcred***
6. ***AWS\_K8\_NAMESPACE = laravel***
7. AWS\_SECRET\_ACCESS\_KEY
8. DOCKER\_REGISTRY\_PASSWORD
9. DOCKER\_REGISTRY\_USER
In GitLab, to prevent a Merge Request (MR) from being completed if any tests fail during the CI/CD process, you can enforce a rule that requires all pipeline jobs to pass before the MR can be merged. This is done by enabling the 'Pipelines must succeed' merge check.
***We have 5 stages as you see***
```
stages:
- code quality
- sast
- docker_build_dev
- build
- unit_test
- ecr_push_prod
- deploy
```
### 4.1 Docker\_build\_dev stage
#### In this section of the pipeline, the following steps are executed:
1. Retrieve a Docker image that includes the necessary services to build the Laravel image.
2. Assign an AWS Elastic Container Registry (ECR) tag to the Laravel image, as it will be pushed to ECR upon successful testing.
3. Store the Laravel image in a specified image path, ensuring its availability for subsequent stages.
4. Push the Laravel image to the container registry to facilitate its use in the upcoming stages of the pipeline.
```
docker_build_dev:
image: docker:20.10.16
stage: docker_build_dev
script:
- echo "Building the application..."
- docker login -u $DOCKER_REGISTRY_USER -p $DOCKER_REGISTRY_PASSWORD
- docker build -t ${AWS_ECR_REPOSITORY}:latest .
- mkdir image
- docker save ${AWS_ECR_REPOSITORY}:latest > image/app.tar
- docker tag ${AWS_ECR_REPOSITORY}:latest asafahmad/laravel:latest
- docker push asafahmad/laravel:latest
artifacts:
paths:
- image
```
> Note: In a production environment, it is more efficient and practical to utilize a single container registry, such as AWS Elastic Container Registry (ECR). This approach streamlines the management of container images and minimizes the complexity that arises from handling multiple repositories.
### 4.2 Build stage
#### In this section of the pipeline:
1. Construct the Composer dependencies, ensuring that all required packages are installed.
2. Preserve essential artifacts, such as the 'vendor' directory and the '.env' file, for later use in subsequent stages.
### **4.3 Test stage**
```
phpunit:
stage: test
dependencies:
- composer
script:
- phpunit --coverage-text --colors=never
artifacts:
exclude:
- "*"
```
Test the container by running the following command:
phpunit — coverage-text — colors=never
### 4.4 ECR\_push\_prod stage
In this section:
1. Pull the AWS base image to make a connection with AWS ECR, you should define **AWS\_ACCESS\_KEY\_ID**, **AWS\_DEFAULT\_REGION**, **AWS\_SECRET\_ACCESS\_KEY** Variables in settings → CI/CD → Variables.
2. Load the **Laravel** image that we save in **Stage1**.
3. Delete The Old image in AWS ECR (Please do not do that in the production env)
4. Push Laravel image to AWS ECR.
### **4.5 Deploy stage**
In this section:
1. Pull AWS base image to make connections with EKS.
2. Export TOKEN from AWS ECR
3. Install Kubectl.
4. We create a secret to allow pods to pull images from ECR.
```
kubectl create secret docker-registry $AWS_K8_ECR_SECRET_NAME --docker-server=$AWS_ECR_REPOSITORY --docker-username=AWS --docker-password=$TOKEN -n $AWS_K8_NAMESPACE || true
```
5\. Deploy YAML files in AWS\_K8 dir (Check it in next section)
6\. Update deployment by restarting pods
```
kubectl rollout restart laravel
```
4.6 AWS\_K8 files
In this dir, you can check the YAML files for deployments, configmap ,secret, namespace and Load balancer service
**4.6.1 laravel\_namespace.yaml**
```
apiVersion: v1
kind: Namespace
metadata:
name: laravel
```
### 4.6.2 **deployment.yaml**
```
apiVersion: apps/v1
kind: Deployment
metadata:
name: laravel
labels:
app: laravel
spec:
replicas: 2
selector:
matchLabels:
app: laravel
template:
metadata:
namespace: laravel
labels:
app: laravel
spec:
imagePullSecrets:
- name: regcred
containers:
- name: laravel-app
image: 715812286512.dkr.ecr.eu-west-3.amazonaws.com/laravel:latest
ports:
- containerPort: 80
env:
- name: DB_HOST
valueFrom:
configMapKeyRef:
name: laravel-config
key: db_host
- name: DB_DATABASE
valueFrom:
configMapKeyRef:
name: laravel-config
key: db_database
- name: DB_USERNAME
valueFrom:
configMapKeyRef:
name: laravel-config
key: db_username
- name: DB_PASSWORD
valueFrom:
secretKeyRef:
name: laravel-secrets
key: db_password
```
### 4.6.3 **service.yaml**
```
apiVersion: v1
kind: Service
metadata:
name: laravel-service
namespace: laravel
spec:
selector:
app: laravel
ports:
- protocol: TCP
port: 80
targetPort: 80
type: LoadBalancer
```
### 4.6.4 secret.yaml
```
apiVersion: v1
kind: Secret
metadata:
name: laravel-secrets
namespace: laravel
type: Opaque
data:
db-password: c2VjcmV0 # "secret" base64 encoded
```
### 4.6.5 configMap.yaml
```
apiVersion: v1
kind: ConfigMap
metadata:
name: laravel-config
namespace: laravel
data:
db_host: "localhost"
db_database: "homestead"
db_username: "homestead"
```
### 5. Conclusion
I have built a complete pipeline using GitLab **CI/CD** for deploying the Laravel app on AWS **EKS**, therefore, we used **ECR** to push the Laravel image and **eksctl** to create the EKS cluster.
---
# Agent Instructions: Querying This Documentation
If you need additional information that is not directly available in this page, you can query the documentation dynamically by asking a question.
Perform an HTTP GET request on the current page URL with the `ask` query parameter:
```
GET https://asafahmadov.gitbook.io/devsecops/case-study.md?ask=
```
The question should be specific, self-contained, and written in natural language.
The response will contain a direct answer to the question and relevant excerpts and sources from the documentation.
Use this mechanism when the answer is not explicitly present in the current page, you need clarification or additional context, or you want to retrieve related documentation sections.